1.0 WordPress Theme Instalation
Video Tutorial
If you don’t like the video or need more instructions, then continue reading. This is a demo Video, please note that in your case you need to Upload AWA Theme.
Install a Theme using WordPress Admin Theme Search
If you’re looking to install a free WordPress theme from the WordPress.org themes directory, then the easiest way is by using the WordPress admin theme search functionality.
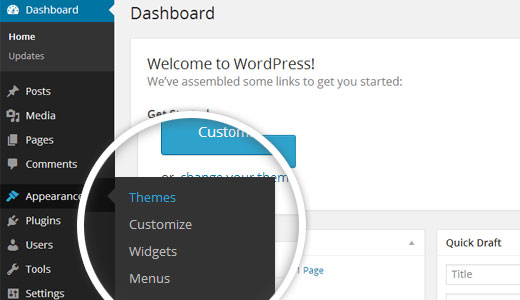
Once you are on the themes page, click on the Add New button at the top.
Install a Theme by using Upload Method from WordPress Admin
The first method that we covered only allows you to install free themes that are available in the WordPress.org theme’s directory. But what if you want to install a commercial “premium” WordPress theme from companies like ThemeLab, StudioPress, iThemes, etc.
Or what if you want to install a custom theme? Well
Start by downloading the .zip file of the theme that you purchased from a marketplace or a commercial theme provider.
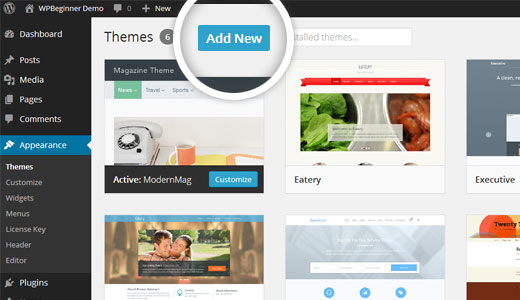
Next login to your WordPress admin area and click on Appearance » Themes.
Once you are on the themes page, click on the Add New button at the top.
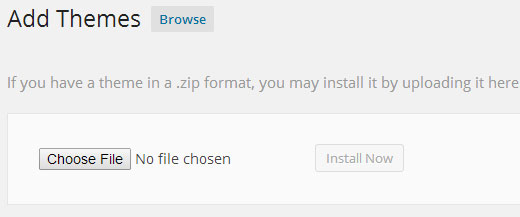
On the next screen, click on the Upload Theme button at the top.

You will be prompted to choose the zip file that you downloaded earlier. Select the file and click Install Now.
Once your theme is installed, you will see a success message along with the link to activate and preview the theme.
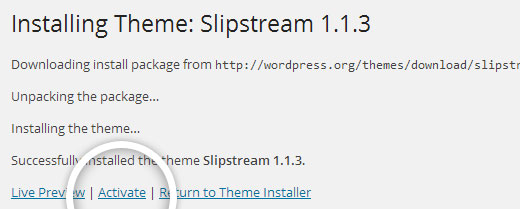
Click on the activate button, and you’ve successfully installed and activated your WordPress theme. Depending on the theme, it may add additional settings options that you may need to configure either through the theme customizer or through a separate options panel.
Note: The theme upload functionality is only available for self-hosted WordPress.org users. If you’re using WordPress.com, then you will not see this option
Installing a WordPress Theme using FTP
If you’re feeling adventurous and
Now that you have read the article above and installed and
Remember you must unzip the folders before you upload a theme using FTP. Once you have uploaded the theme, you would need to go to your admin area and click on Appearance » Themes.
You should see the theme that you uploaded listed there. Bring your mouse on top of that theme and click on the activate button.
We hope this step by step guide helped you install a WordPress theme on your site. This article was created using the screenshots of version WordPress 3.9. Since WordPress is constantly evolving, we will try our best to keep this guide up to date. If you notice that there is something missing, then feel free to let us know.